1. 엑티비티 XML 레이아웃 리소스 파일 추가
먼저 A 엑티비티와 B액티비티의 화면 UI를 정의할 xml 레이아웃 리소스 파일을 생성합니다. 경로는 /res/layout/ 경로 아래에 생성하도록 합니다.
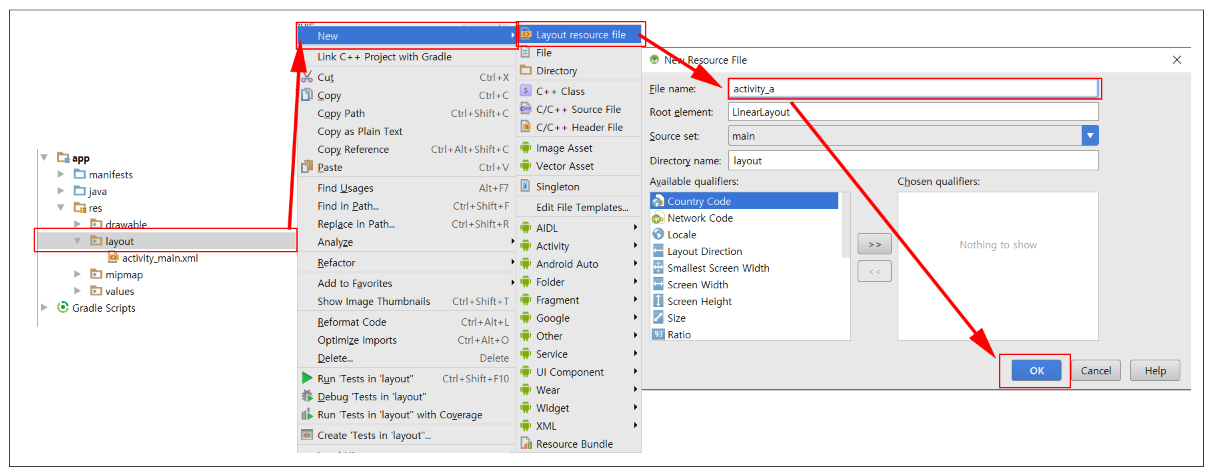
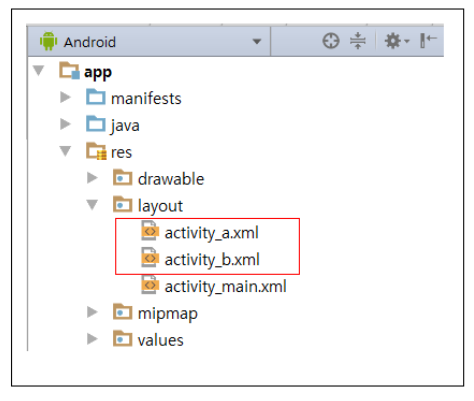
▼ /app/res/ 경로밑에 layout 폴더를 우클릭하여 [New]-[Layout resource file]을 클릭하고 파일 이름을 activity_a로 지정하고 OK 버튼을 클릭합니다. 마찬가지 방식으로 B 액티비티의 레이아웃 리소스 파일도 생성해줍니다. 파일을 정상적으로 추가하면 아래와 같이 /res/layout/ 경로 밑에 activity_a.xml과 activity_b.xml 파일이 생성되는 것을 확인할 수 있습니다.
2. 엑티비티 레이아웃 리소스 작성
목표는 엑티비티 생성과 호출이므로 UI 구성은 단순하게 할 것입니다. 먼저 /res/layout/activity_a.xml입니다.
<?xml version="1.0" encoding="utf-8"?>
<LinearLayout xmlns:android="http://schemas.android.com/apk/res/android"
android:orientation="vertical" android:layout_width="match_parent"
android:layout_height="match_parent">
<Button
android:id="@+id/button2"
android:layout_width="match_parent"
android:layout_height="wrap_content"
android:onClick="onClick_handler"
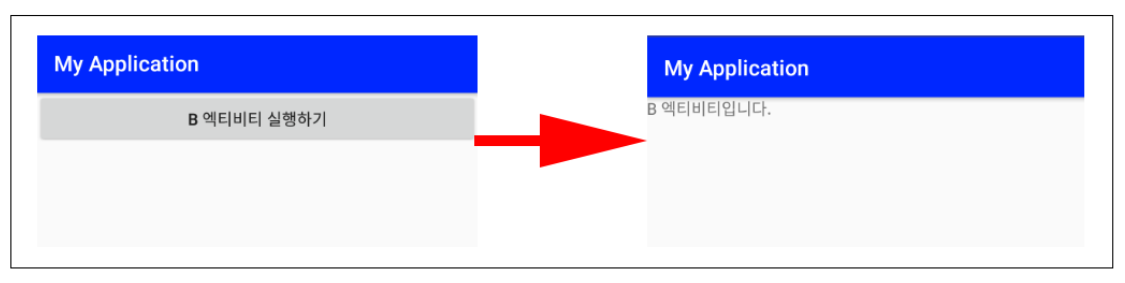
android:text="B 엑티비티 실행하기" />
</LinearLayout>
▼ LinearLayout 밑에 Button View를 배치합니다. 해당 Button을 클릭하였을 때 B 액티비티를 실행하도록 구현할 것입니다. 그러기 위해서 onClick 속성 값을 지정하고 버튼 클릭 이벤트에 대한 처리를 소스에서 처리할 수 있도록 미리 지정합니다. 다음은 B 액티비티에 해당하는 /res/layout/activity_b.xml입니다.
<?xml version="1.0" encoding="utf-8"?>
<LinearLayout xmlns:android="http://schemas.android.com/apk/res/android"
    android:orientation="vertical" android:layout_width="match_parent"
    android:layout_height="match_parent">

    <TextView
        android:id="@+id/textView6"
        android:layout_width="match_parent"
        android:layout_height="wrap_content"
        android:text="B 엑티비티입니다." />
</LinearLayout>
▼ LinearLayout 하위에 TextView를 배치한 형태입니다. 단순히 해당 화면이 B 액티비티 영역임을 알려주기 위해 TextView의 Text 속성만 "B 액티비티입니다."로 지정하였습니다.
3. 클래스(Class) 추가하기
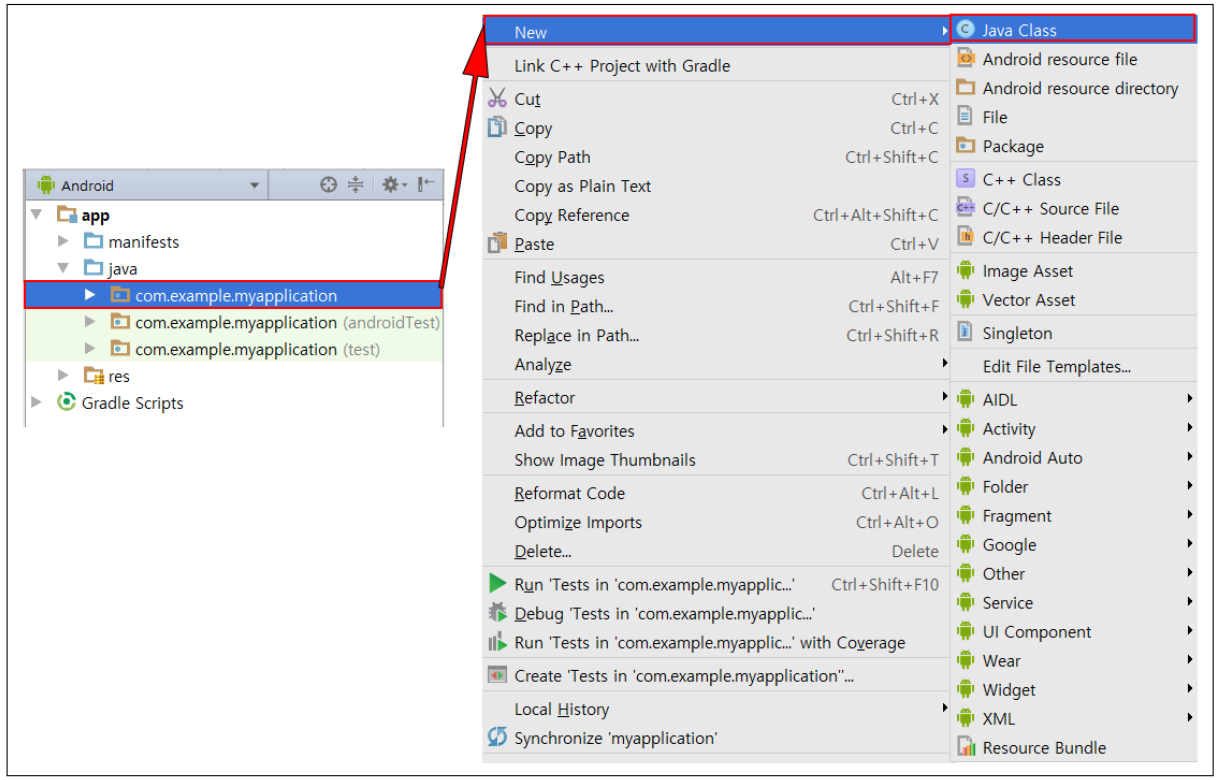
▼ Activity를 실행하기 위해서는 Activity Class를 상속받아 onCreate() 함수를 오버 라이딩하는 Class를 생성해야 합니다. [New]-[Java Class]를 클릭합니다.
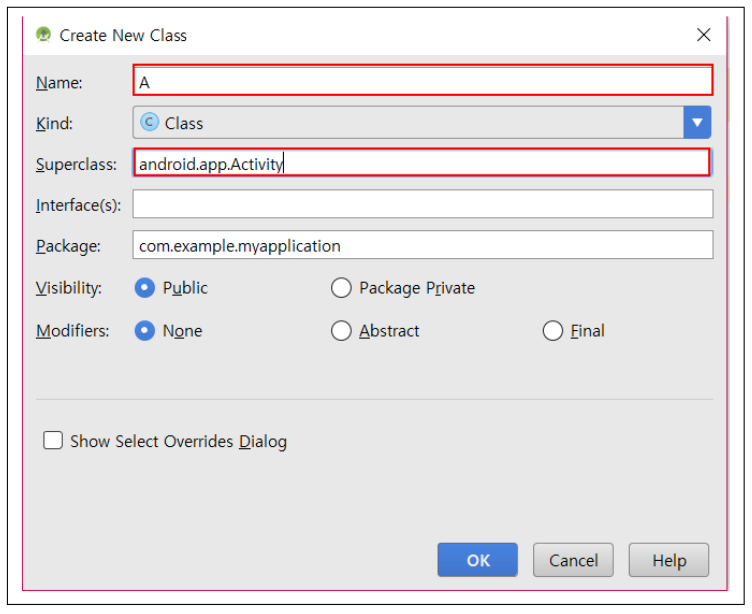
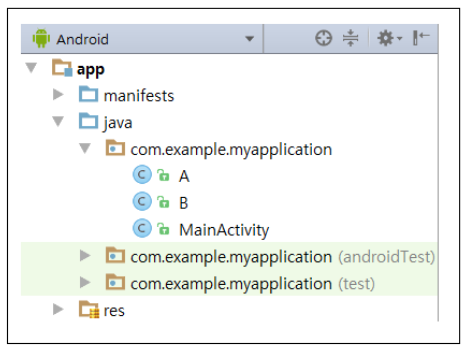
▼ 클래스(Class) 이름을 지정하고 Activity를 상속받아 onCreate() 함수를 구현해주기 위해 SuperClass 입력란에 Activity를 입력하고 OK 버튼을 클릭합니다. 마찬가지 방식으로 B 액티비티 실행을 위한 클래스 파일을 생성하게 되면 아래와 같이 클래스 파일이 생성됩니다.
4. 클래스(Class) 소스 구현
public class A extends Activity {
    @Override
    protected void onCreate(Bundle savedInstanceState)
    {
        super.onCreate(savedInstanceState);
        setContentView(R.layout.activity_a);
    }

    public void onClick_handler(View view)
    {
        Intent intent = new Intent(A.this, B.class);

        startActivity(intent);
    }
}
▼ A.class 구현 내용입니다. Activity를 상속받고 있으며 onCreate() 함수를 재정의합니다. setContentView() 함수를 호출하면서 인자 정보로 우리가 앞서 생성했던 A 액티비티의 XML 레이아웃 리소스 참조를 넘겨줍니다. 그리고 Button을 클릭하였을 때 B 액티비티를 실행하기 위한 코드를 작성합니다. Button을 클릭하면 인텐트를 생성하고 생성한 인텐트를 인자로하는 startActivity() 함수를 호출하여 B 엑티비티를 실행하도록 합니다.
public class B extends Activity {
    @Override
    protected void onCreate(Bundle savedInstanceState)
    {
        super.onCreate(savedInstanceState);
        setContentView(R.layout.activity_b);
    }
}
▼ B.class도 마찬가지로 onCreate() 함수를 재정의합니다. setContentView() 인자로는 B 액티비티에 대한 XML 레이아웃 리소스 참조를 넘겨줍니다.
5. AndroidManifast.xml에 엑티비티 정보 추가하기
안드로이드에서는 액티비티를 생성하고 사용하기 위해서는 AndroidManifast.xml에 새로운 액티비티에 대한 정보를 작성해야 합니다.
<manifest xmlns:android="http://schemas.android.com/apk/res/android"
    package="com.example.myapplication">

    <application
        android:icon="@mipmap/ic_launcher"
        android:label="@string/app_name"
        android:roundIcon="@mipmap/ic_launcher_round"
        android:theme="@style/AppTheme">
        <activity android:name=".A">
            <intent-filter>
                <action android:name="android.intent.action.MAIN" />
                <category android:name="android.intent.category.LAUNCHER" />
            </intent-filter>
        </activity>
        <activity android:name=".B"></activity>
    </application>
</manifest>
▼ AndroidManifast.xml에 액티비티를 선언할 때는 <application> 요소 하위에 <Activity> 요소를 사용하여 선언합니다. 요소의 속성 중 name 속성 값을 Activity 실행을 위해 추가했던 클래스명을 작성하면 됩니다.