
* call 버튼을 누르면 다른 Activity를 불러 화면전환을 하고 다시 close버튼을 누르면 해당 액티비티를 종료하고 이전 액티비티로
돌아가도록 해보겠습니다.
액티비티 전환의 큰 흐름 순서
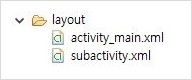
1. 화면에 보여줄 Layout 파일 생성
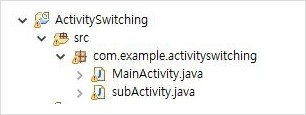
2. Acvitiy 로 부터 상속받는 클래스를 만들고 OnCreate메소드를 재정의해서 내부에 setContentView메소드를
이용해서 레이아웃을 출력하도록 만들어줍니다.
3. 새로운 액티비티를 출력해주는 클래스를 메니페스트에 등록합니다
4. 출력하고자 할때에는 Intent를 만들어서 startActivity 매서드를 사용합니다.
5. 액티비티를 제거하고자 할때에는 finish() 메서드 사용
* activity는 stack이 관리합니다.
- 다른 activity 부르게되면 스택에올라오고 이전 엑티비티 불르기 위해서는해당 엑티비티를 종료시키면됩니다.
- 화면위에 화면을 계속 쌓는다고 생각하시면 됩니다. finish()하면 쌓은 순의 역순으로 제거되겠지요?
<?xml version="1.0" encoding="utf-8"?>
<LinearLayout xmlns:android="http://schemas.android.com/apk/res/android"
android:orientation="vertical"
android:layout_width="fill_parent"
android:layout_height="fill_parent"
>
<TextView
android:id="@+id/text"
android:layout_width="fill_parent"
android:layout_height="wrap_content"
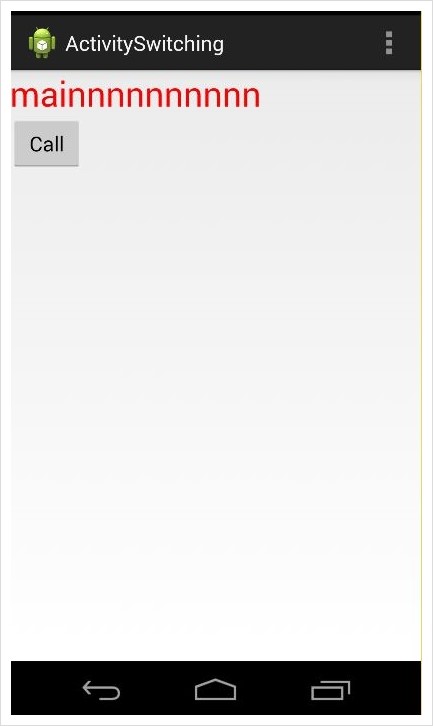
android:text="mainnnnnnnnnn"
android:textSize="30sp"
android:textColor="#ff0000"
/>
<Button
android:id="@+id/call"
android:layout_width="wrap_content"
android:layout_height="wrap_content"
android:onClick="mOnClick"
android:text="Call"
/>
</LinearLayout>
<?xml version="1.0" encoding="utf-8"?>
<LinearLayout xmlns:android="http://schemas.android.com/apk/res/android"
android:orientation="vertical"
android:layout_width="fill_parent"
android:layout_height="fill_parent"
>
<TextView
android:layout_width="fill_parent"
android:layout_height="wrap_content"
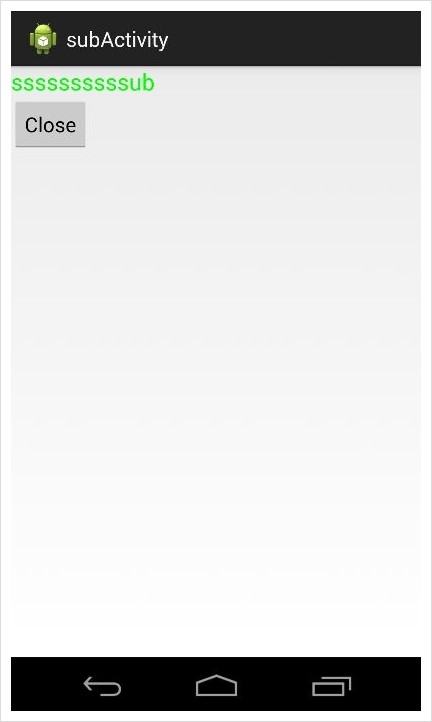
android:text="ssssssssssub"
android:textSize="20sp"
android:textColor="#00ff00"
/>
<Button
android:id="@+id/close"
android:layout_width="wrap_content"
android:layout_height="wrap_content"
android:onClick="mOnClick"
android:text="Close"
/>
</LinearLayout>
2. 동시에 subAcitivty.xml을 실제 화면상에 출력해주기위한 java 파일을 만듦니다.
* xml 파일자체는 속성의 정보들을 저장할 뿐 아무런 역할을 하지 않습니다 이를 가져다 사용해주는 것이 필요하겠죠?
package com.example.activityswitching;

import android.app.Activity;
import android.content.Intent;
import android.os.Bundle;
import android.util.Log;
import android.view.Menu;
import android.view.MenuItem;
import android.view.View;
import android.widget.TextView;

public class MainActivity extends Activity {

    @Override
    protected void onCreate(Bundle savedInstanceState) {
        super.onCreate(savedInstanceState);
        setContentView(R.layout.activity_main);

    }

    public void mOnClick(View v){
        Intent intent = new Intent(this,subActivity.class);
        startActivity(intent);
    }


    @Override
    public boolean onCreateOptionsMenu(Menu menu) {
        // Inflate the menu; this adds items to the action bar if it is present.
        getMenuInflater().inflate(R.menu.main, menu);
        return true;
    }

    @Override
    public boolean onOptionsItemSelected(MenuItem item) {
        // Handle action bar item clicks here. The action bar will
        // automatically handle clicks on the Home/Up button, so long
        // as you specify a parent activity in AndroidManifest.xml.
        int id = item.getItemId();
        if (id == R.id.action_settings) {
            return true;
        }
        return super.onOptionsItemSelected(item);
    }
}
package com.example.activityswitching;

import android.app.Activity;
import android.os.Bundle;
import android.util.Log;
import android.view.View;

public class subActivity extends Activity {


    @Override
    public void onCreate(Bundle bundle){
        super.onCreate(bundle);
        setContentView(R.layout.subactivity);


    }

    //버튼의 이벤트 핸들러
    public void mOnClick(View v){
        finish();
    }
}
3. AndroidManifest.xml에 등록
액티비티는 보안상이유때문에 반드시 메니페스트에 등록해야 합니다
메니페시트에 등록되지 않는 엑티비티는 사용하지 못합니다
<?xml version="1.0" encoding="utf-8"?>
<manifest xmlns:android="http://schemas.android.com/apk/res/android"
    package="com.example.activityswitching"
    android:versionCode="1"
    android:versionName="1.0" >

    <uses-sdk
        android:minSdkVersion="19"
        android:targetSdkVersion="19" />

    <application
        android:allowBackup="true"
        android:icon="@drawable/ic_launcher"
        android:label="@string/app_name"
        android:theme="@style/AppTheme" >
        <activity
            android:name=".MainActivity"
            android:label="@string/app_name" >
            <intent-filter>
                <action android:name="android.intent.action.MAIN" />

                <category android:name="android.intent.category.LAUNCHER" />
            </intent-filter>
        </activity>


        <!-- 이렇게 액티비티를 등록합니다!!! -->
        <activity
            android:name="com.example.activityswitching.subActivity"
            android:label="subActivity"/>


    </application>

</manifest>