    <TextView
        android:id="@+id/textView1"
        android:layout_width="match_parent"
        android:layout_height="wrap_content"
        android:text="TEST를 위한 TextView입니다."
        android:textColor="@color/colorPrimary"
        android:textSize="20dp" />

    <TextView
        android:id="@+id/textView2"
        android:layout_width="match_parent"
        android:layout_height="wrap_content"
        android:text="TEST를 위한 TextView입니다."
        android:textColor="@color/colorPrimary"
        android:textSize="20dp" />

    <TextView
        android:id="@+id/textView3"
        android:layout_width="match_parent"
        android:layout_height="wrap_content"
        android:text="TEST를 위한 TextView입니다."
        android:textColor="@color/colorPrimary"
        android:textSize="20dp" />
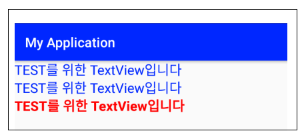
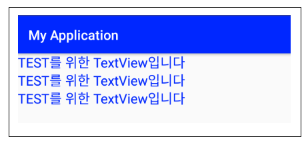
▼ TextView 3개가 배치되어 있고 각 TextView의 text, textColor, textSize 속성값을 모두 동일한 값을 사용하고 있습니다. 만약 저런 공통 속성을 가지는 뷰(View)가 앱 내에서 수십 개씩 된다면 일일이 속성을 지정하는 건 굉장히 힘든 일이 될 것입니다. 이때 재사용이 가능한 스타일 리소스를 추가하면 보다 간편하게 공통 속성을 지정할 수 있습니다.
1. 스타일 리소스(Style Resource) 파일 추가
스타일 리소스는 레이아웃 리소스와는 별개의 xml 파일에 추가합니다. /res/values/ 경로밑에 xml 리소스 파일을 추가하고 파일 이름은 자유롭게 지정하되. xml 확장자를 가지도록 합니다.
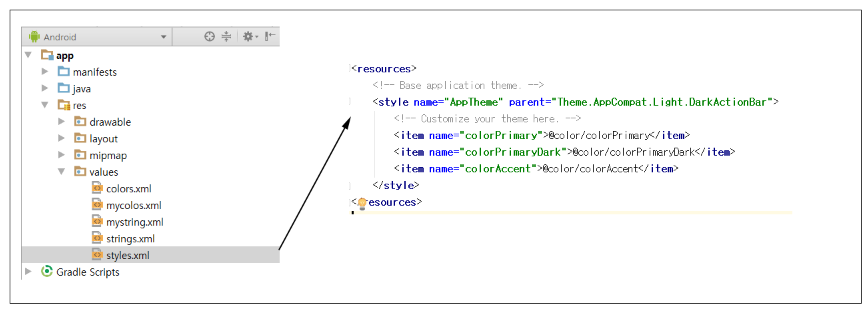
▼ 안드로이드 프로젝트를 생성하면 /res/values/ 경로밑에 default로 생성된 styles.xml 파일이 존재합니다. 해당 파일에 본인의 스타일 리소스를 추가해도 되지만 예제와 구분을 위해 따로 xml 리소스 파일을 생성하도록 하겠습니다.
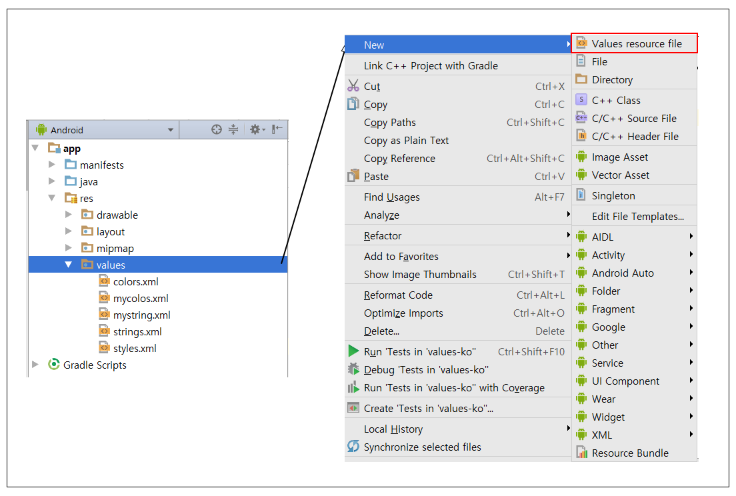
▼ values 폴더를 우클릭하여 [New]-[Values resource file]을 클릭합니다.
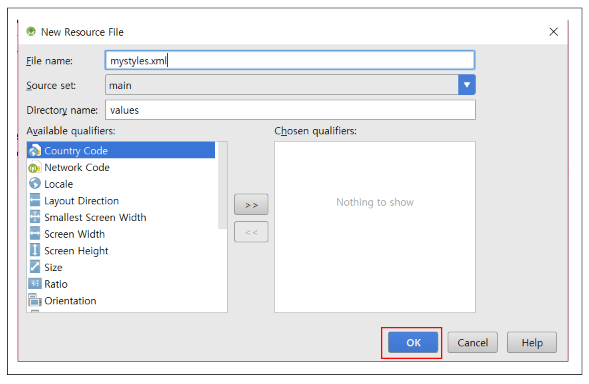
▼ 확장자는 .xml로 지정하고 파일 이름은 자유롭게 지정하면 됩니다. 저 같은 경우는 mystyles.xml로 파일 이름을 지정하였습니다. 여기까지 하면 /res/values/ 경로 밑에 리소스를 추가할 수 있는 XML 리소스 파일 생성이 끝납니다.
2. 스타일 리소스(Style Resource) 추가
앞에서 3개의 TextView의 textSize, text, textColor 속성이 중복된 값을 사용하고 있었습니다.
<?xml version="1.0" encoding="utf-8"?>
<resources>
    <style name = "TEXTVIEW_STYLE">
        <item name = "android:text">TEST를 위한 TextView입니다</item>
        <item name = "android:textSize">20dp</item>
        <item name = "android:textColor">@color/colorPrimary</item>
    </style>
</resources>
■ <resource>~</resource>
- XML 리소스 파일의 루트 요소입니다.
- 모든 리소스 정의는 <resource>의 하위요소로 정의해야 합니다.
■ <style>~<style>
- 스타일 리소스를 추가할 때 사용하는 요소입니다.
- name 속성값을 지정하여 다른 곳에서 해당 스타일 리소스를 참조할 수 있도록 합니다.
■ <item>~</item>
- 스타일을 지정하고자 하는 속성에 따라 문자열, 색상, 다른 리소스에 대한 참조를 지정합니다.
▼ TextView의 공통된 속성에 대하여 스타일 리소스를 정의한 형태입니다. item 요소의 name 속성 값은 TextView의 속성명과 동일하게 작성하고 요소값에는 지정하고자 하는 속성값을 지정하면 됩니다.
3. XML 레이아웃 리소스에서 스타일 리소스(Style Resource) 참조하기
    <TextView
        android:id="@+id/textView1"
        android:layout_width="match_parent"
        android:layout_height="wrap_content"
        style="@style/TEXTVIEW_STYLE"/>

    <TextView
        android:id="@+id/textView2"
        android:layout_width="match_parent"
        android:layout_height="wrap_content"
        style="@style/TEXTVIEW_STYLE"/>

    <TextView
        android:id="@+id/textView3"
        android:layout_width="match_parent"
        android:layout_height="wrap_content"
        style="@style/TEXTVIEW_STYLE"/>
▼ TextView의 공통된 속성들을 제거하고 대신 style 속성을 추가하였습니다. style의 속성값은 우리가 추가했던 스타일 리소스의 참조를 "@style/TESTVIEW_STYLE" 같이 작성합니다.
4. 스타일 리소스(Style Resource) 상속
만약 위 TextView 중에서 한 개의 TextView만 나머지 속성들은 동일하게 지정하면서 textColor 속성만 다르게 지정하고 싶으면 어떻게 해야 할까? 이럴 때는 스타일 리소스를 따로 추가를 하고 <style> 요소의 parent 속성 값을 상속받아야 하는 속성의 상위 스타일로 지정함으로써 해결할 수 있습니다. 속성을 상속받으면 변경이 필요한 속성만 재정의하거나 따로 속성을 추가하여 사용할 수 있습니다.
<?xml version="1.0" encoding="utf-8"?>
<resources>
    <style name = "TEXTVIEW_STYLE">
        <item name = "android:text">TEST를 위한 TextView입니다</item>
        <item name = "android:textSize">20dp</item>
        <item name = "android:textColor">@color/colorPrimary</item>
    </style>

    <style name = "TEXTVIEW_STYLE_1" parent = "TEXTVIEW_STYLE">
        <item name = "android:textColor">#FF0000</item>
        <item name = "android:textStyle">bold</item>
    </style>
</resources>
▼ 스타일 리소스 TEXTVIEW_STYLE_1은 parent 속성 값을 TEXTVIEW_STYLE로 지정함으로써 상위 스타일 속성을 그대로 상속받습니다. 마치 Class의 상속개념처럼 textColor 속성값을 재정의하고 textStyle 속성을 추가하였습니다.
    <TextView
        android:id="@+id/textView1"
        android:layout_width="match_parent"
        android:layout_height="wrap_content"
        style ="@style/TEXTVIEW_STYLE"/>

    <TextView
        android:id="@+id/textView2"
        android:layout_width="match_parent"
        android:layout_height="wrap_content"
        style ="@style/TEXTVIEW_STYLE"/>

    <TextView
        android:id="@+id/textView3"
        android:layout_width="match_parent"
        android:layout_height="wrap_content"
        style ="@style/TEXTVIEW_STYLE_1"/>
▼ textView3의 style 속성값을 상위 스타일 속성을 상속받아 재정의한 TEXTVIEW_STYLE_1로 지정하고 있습니다.