
1. ProgressBar 구현예제
먼저 앱의 메인 화면을 구성하는 XML 레이아웃 리소스입니다.
<?xml version="1.0" encoding="utf-8"?>
<android.support.constraint.ConstraintLayout xmlns:android="http://schemas.android.com/apk/res/android"
    xmlns:app="http://schemas.android.com/apk/res-auto"
    xmlns:tools="http://schemas.android.com/tools"
    android:layout_width="match_parent"
    android:layout_height="match_parent"
    tools:context=".MainActivity">

    <LinearLayout
        android:layout_width="match_parent"
        android:layout_height="match_parent"
        android:orientation="vertical">

        <TextView
            android:id="@+id/cureentValue"
            android:layout_width="match_parent"
            android:layout_height="wrap_content"
            android:text="CureentValue"
            android:textAlignment="center" />

        <LinearLayout
            android:layout_width="match_parent"
            android:layout_height="wrap_content"
            android:orientation="horizontal">

            <ProgressBar
                android:id="@+id/h_progressbar"
                style="?android:attr/progressBarStyleHorizontal"
                android:layout_width="wrap_content"
                android:layout_height="wrap_content"
                android:layout_weight="2"
                android:layerType="none" />

            <EditText
                android:id="@+id/editText"
                android:layout_width="wrap_content"
                android:layout_height="wrap_content"
                android:layout_weight="1"
                android:width="50dp"
                android:ems="10"
                android:inputType="textPersonName"
                android:text="" />

            <Button
                android:id="@+id/button"
                android:layout_width="wrap_content"
                android:layout_height="wrap_content"
                android:layout_gravity="right"
                android:layout_weight="1"
                android:gravity="right"
                android:onClick="ClickHandler"
                android:text="실행"
                android:textAlignment="center" />
        </LinearLayout>
    </LinearLayout>
</android.support.constraint.ConstraintLayout>
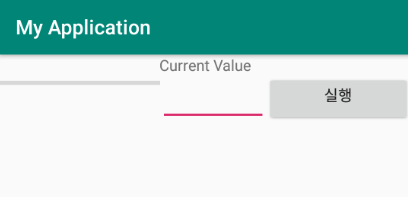
▼ ProgressBar / EditText / TextView / Button 위젯이 배치된 형태입니다. EditText로부터 입력된 정수형 데이터를 Max 값으로 하여 0~Max값까지 반복문을 통하여 Count 하는 예제입니다. AsyncTask를 통해 구현하며 반복문을 돌면서 현재 Value 값(작업 진행 정도 수치 값)을 통하여 작업 진행 정도를 ProgressBar를 통해 표시하도록 합니다. 먼저 Main 화면을 실행하는 자바 소스코드입니다.
public class MainActivity extends AppCompatActivity {

    ProgressBar myProgressBar;
    EditText myEditText;
    TextView myTextView;

    @Override
    protected void onCreate(Bundle savedInstanceState) {
        super.onCreate(savedInstanceState);
        setContentView(R.layout.activity_main);

        this.initializeView();
    }

    public void initializeView()
    {
        myProgressBar = (ProgressBar)findViewById(R.id.h_progressbar);
        myEditText = (EditText)findViewById(R.id.editText);
        myTextView = (TextView)findViewById(R.id.cureentValue);
    }

    public void ClickHandler(View view)
    {
        int value = Integer.parseInt(myEditText.getText().toString());
        MyAsyncTask asyncTask = new MyAsyncTask(value, myTextView, myProgressBar);
        asyncTask.execute();
    }
}
▼ InitializeView() 함수는 레이아웃 리소스에 정의된 View들의 참조를 얻어오는 함수입니다.
▼ ClickHandler() 함수는 버튼 클릭에 대한 이벤트 처리를 담당하는 함수입니다. 해당 함수에서는 EditText의 Text 값을 읽어와 int형 변수에 저장합니다. 그런 다음 구현된 AsynTask를 생성하면서 필요한 인자를 넘겨주고 있습니다. 최종적으로 execute() 함수를 AsyncTask를 실행합니다.
public class MyAsyncTask extends AsyncTask<Void, Integer, Boolean> {

    int value;
    TextView textView;
    ProgressBar progressBar;

    public MyAsyncTask(int value, TextView textView, ProgressBar progressbar)
    {
        this.textView = textView;
        this.progressBar = progressbar;
        this.value = value;
    }

    @Override
    protected void onPreExecute() {
        super.onPreExecute();

        progressBar.setMax(value);
        progressBar.setProgress(0);
    }

    @Override
    protected Boolean doInBackground(Void... strings){

        for(int i=0; i<= value; i++)
        {
            publishProgress(i);
        }

        return true;
    }

    @Override
    protected void onPostExecute(Boolean s) {
        super.onPostExecute(s);
    }

    @Override
    protected void onProgressUpdate(Integer... values) {
        progressBar.setProgress(values[0].intValue());
        textView.setText(values[0].toString());

        super.onProgressUpdate(values);
    }

    @Override
    protected void onCancelled(Boolean s) {
        super.onCancelled(s);
    }
}
▼ onPreExecute() 함수에서는 setMax()를 통해 ProgressBar의 작업 진행 정도를 표시할 Max 값을 지정합니다. 해당 값은 EditText에서 사용자가 입력한 데이터가 들어갑니다. 그다음으로 setProgress() 함수를 통해서 ProgressBar의 최초 값을 지정합니다.
▼ doInBackground() 함수에서는 지정된 Max Value까지 반복문을 실행합니다.
이때 ProgressBar의 진행 정도를 표현하기 위해 UI 갱신이 이루어지기 때문에 publishProgress() 함수를 호출하여 UI 업데이트를 위한 작업을 진행합니다. publishProgress() 함수를 호출하면 onProgressUpdate() 함수에 UI 업데이트 관련 처리를 진행하면 되는데 해당 예제에서는 setProgress()를 통해 현재 ProgressBar의 값을 지정합니다.