
http 나 https 등 웹형식의 네트워크 교신을 할때 쓰레드와 Handler 등으로 다소 복잡한 코딩을 해야 한다.
이때 메인쓰레드에서는 UI를 직접 변경이 불가능하기 때문에 handler 를 통하여 정보를 보내고 이를 다시 받아 처리하는 등의 또다른 작업도 해야한다.
Volley 라는 놈은 이러한 쓰레드 작업을 알아서 해주고 자체 메소드 오버라이딩 만으로 웹의 응답처리를 간단히 할 수 있다.
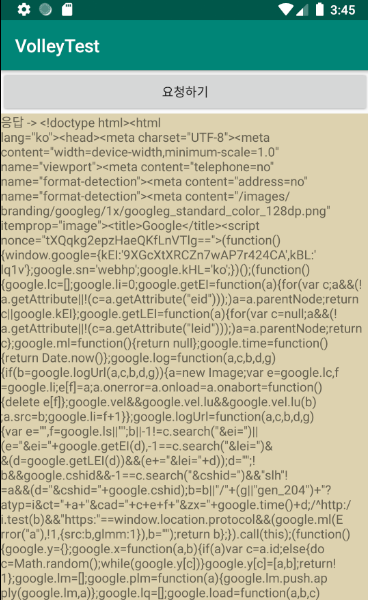
위의 실행화면은 요청하기 버튼을 클릭하면 https://www.google.co.kr 의 웹주소에 Get 방식으로 정보를 요청하고 응답결과를 아래 화면에 텍스트로 출력하는 간단한 예제내용이다.
[ AndroidManifest.xml ]
|
1
2
3
4
|
<uses-permission android:name="android.permission.INTERNET" />
<application
...
android:usesCleartextTraffic="true">
|
cs |
[ build.gradle ] (app)
|
1
2
3
|
dependencies {
implementation 'com.android.volley:volley:1.1.0'
}
|
cs |
volley 를 삽입하고, Sync Now 를 눌러 라이브러리를 추가한다.
[ activity_main.xml ]
|
1
2
3
4
5
6
7
8
9
10
11
12
13
14
15
16
17
18
19
20
21
22
23
24
25
26
27
28
29
30
|
<?xml version="1.0" encoding="utf-8"?>
<LinearLayout xmlns:android="http://schemas.android.com/apk/res/android"
xmlns:app="http://schemas.android.com/apk/res-auto"
xmlns:tools="http://schemas.android.com/tools"
android:layout_width="match_parent"
android:layout_height="match_parent"
android:orientation="vertical"
tools:context=".MainActivity">
<Button
android:id="@+id/button1"
android:text="요청하기"
android:layout_width="match_parent"
android:layout_height="wrap_content"/>
<ScrollView
android:id="@+id/scrollView1"
android:background="#DDD2AF"
android:layout_width="match_parent"
android:layout_height="match_parent">
<LinearLayout
android:layout_width="match_parent"
android:layout_height="match_parent">
<TextView
android:id="@+id/textView1"
android:layout_width="match_parent"
android:layout_height="wrap_content"/>
</LinearLayout>
</ScrollView>
</LinearLayout>
|
cs |
ScrollView 를 넣어서 그안에서 TextView에 응답 내용을 출력하도록 하였다.
[ MainActivity.java ]
|
1
2
3
4
5
6
7
8
9
10
11
12
13
14
15
16
17
18
19
20
21
22
23
24
25
26
27
28
29
30
31
32
33
34
35
36
37
38
39
40
41
42
43
44
45
46
47
48
49
50
51
52
53
54
55
56
57
58
59
60
61
62
63
64
65
66
67
68
69
70
71
72
73
74
75
76
77
78
79
80
81
82
83
|
import androidx.appcompat.app.AppCompatActivity;
import android.os.Bundle;
import android.view.View;
import android.widget.Button;
import android.widget.TextView;
import com.android.volley.AuthFailureError;
import com.android.volley.Request;
import com.android.volley.RequestQueue;
import com.android.volley.Response;
import com.android.volley.VolleyError;
import com.android.volley.toolbox.StringRequest;
import com.android.volley.toolbox.Volley;
import java.util.HashMap;
import java.util.Map;
public class MainActivity extends AppCompatActivity {
Button button1;
TextView textView1;
static RequestQueue requestQueue;
@Override
protected void onCreate(Bundle savedInstanceState) {
super.onCreate(savedInstanceState);
setContentView(R.layout.activity_main);
textView1 = findViewById(R.id.textView1);
button1 = findViewById(R.id.button1);
button1.setOnClickListener(new View.OnClickListener() {
@Override
public void onClick(View v) {
requestProcess();
}
});
// RequestQueue 객체생성
if (requestQueue == null) {
requestQueue = Volley.newRequestQueue(getApplicationContext());
}
}
public void requestProcess() {
String url = "https://www.google.co.kr";
StringRequest request = new StringRequest(
Request.Method.GET,
url,
new Response.Listener<String>() {
// 요청을 보내고 응답받았을때
@Override
public void onResponse(String response) {
println("응답 -> " + response);
}
},
new Response.ErrorListener() {
// 요청보내고 에러 발생시에 호출되는 리스너
@Override
public void onErrorResponse(VolleyError error) {
println("에러 -> " + error.getMessage());
}
}
) {
// POST 방식으로 요청할 경우에 전달하는 파라미터값들 지정
@Override
protected Map<String, String> getParams() throws AuthFailureError {
//return super.getParams();
Map<String,String> params = new HashMap<String,String>();
return params;
}
};
// 캐쉬기능을 끊다. 바로바로 내용처리되도록
request.setShouldCache(false);
requestQueue.add(request);
}
public void println(String data) {
textView1.setText(data + "\n");
}
}
|
cs |
[ 소스 추가 부연 ]
[ MainActivity.java ] - 소스 보완
|
1
2
3
4
5
6
7
8
9
10
11
12
13
14
15
16
17
18
19
20
21
22
23
24
25
26
27
28
29
30
31
32
33
34
|
public class MainActivity extends AppCompatActivity {
public static final String TAG = "MyRequestQueue";
static RequestQueue requestQueue;
protected void onCreate(Bundle savedInstanceState) {
......
// RequestQueue 객체생성
if (requestQueue == null) {
requestQueue = Volley.newRequestQueue(getApplicationContext());
}
}
public void requestProcess() {
......
// StringRequest 객체의 태그값을 지정
request.setTag(TAG);
// 캐쉬기능을 끊다. 바로바로 내용처리되도록
request.setShouldCache(false);
requestQueue.add(request);
}
@Override
protected void onStop() {
super.onStop();
if (requestQueue != null) {
// RequestQueue 의 TAG 값으로 지정된 Queue 안의 모든 request들을 취소한다.
requestQueue.cancelAll(TAG);
}
}
}
|
cs |
 Volley 로 웹요청하고 응답받기2 - Post방식 , 로그인-회...
 Virtual Device , 디자인 화면