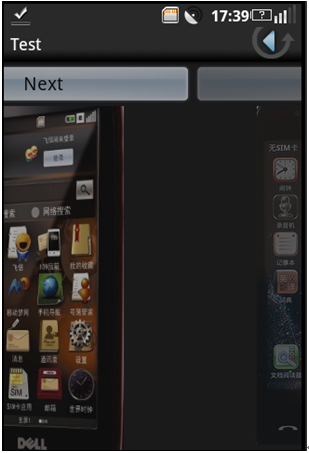
아이폰이나 안드로이드 어플들을 사용하다보면, 화면을 왼쪽 또는 오른쪽으로 드래그했을때,
화면이 휙휙 슬라이딩 되는 것처럼 전환되는 것들을 볼 수 있습니다.
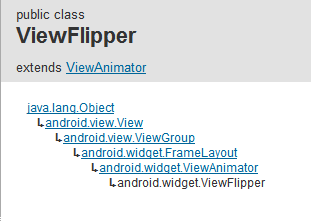
ViewFlipper은 이러한 효과를 더 손쉽게 사용할 수 있도록 제공해줍니다.

ViewFlipper를 사용한 예제와는 조금 다르지만, 이런 효과를 구현할 수 있습니다.
ViewFlipper은 FrameLayout을 상속받습니다.

FrameLayout은 AbsoluteLayout과 비슷하게 Layout안의 각각의 View 들이 서로 좌표를 겹쳐서 가집니다.
(나중에 그려진 View가 먼저 그려진 View를 덮어 버립니다.) 이 점을 주의해야 합니다.
View를 좌우로 밀었을 때의 애니메이션 효과를 미리 만들어줍니다.
이전에 다루었던 애니메이션 부분들과 어느 정도 이어집니다.
[안드로이드] Layout을 통해 Tween Animation 구현하기 (투명도 조절) - http://snowbora.com/390
[안드로이드] Layout을 통해 Tween Animation 구현하기 (개체 움직임) - http://snowbora.com/391
[안드로이드] Layout을 통해 Tween Animation 구현하기 (Set 태그) - http://snowbora.com/392
appear_from_left.xml
<?xml version="1.0" encoding="utf-8"?>
<set xmlns:android="http://schemas.android.com/apk/res/android">
<translate
android:fromXDelta="-100%p"
android:toXDelta="0%p"
android:duration="500"/>
<alpha
android:fromAlpha="0.0"
android:toAlpha="1.0"
android:duration="500" />
</set>
appear_from_right.xml
<?xml version="1.0" encoding="utf-8"?>
<set xmlns:android="http://schemas.android.com/apk/res/android">
<translate
android:fromXDelta="100%p"
android:toXDelta="0%p"
android:duration="500"/>
<alpha
android:fromAlpha="0.0"
android:toAlpha="1.0"
android:duration="500" />
</set>
disappear_to_left.xml
<?xml version="1.0" encoding="utf-8"?>
<set xmlns:android="http://schemas.android.com/apk/res/android">
<translate
android:fromXDelta="0%p"
android:toXDelta="-100%p"
android:duration="500"/>
<alpha
android:fromAlpha="1.0"
android:toAlpha="0.0"
android:duration="500" />
</set>
disappear_to_right.xml
<?xml version="1.0" encoding="utf-8"?>
<set xmlns:android="http://schemas.android.com/apk/res/android">
<translate
android:fromXDelta="0%p"
android:toXDelta="100%p"
android:duration="500"/>
<alpha
android:fromAlpha="1.0"
android:toAlpha="0.0"
android:duration="500" />
</set>
그리고 main.xml을 작성해봅니다.
<?xml version="1.0" encoding="utf-8"?>
<LinearLayout xmlns:android="http://schemas.android.com/apk/res/android"
android:orientation="vertical"
android:layout_width="fill_parent"
android:layout_height="fill_parent"
>
<TextView
android:layout_width="fill_parent"
android:layout_height="wrap_content"
android:text="@string/hello"/>
<ViewFlipper
android:id="@+id/viewFlipper"
android:layout_width="fill_parent"
android:layout_height="fill_parent">
<TextView
android:id="@+id/view1"
android:layout_width="fill_parent"
android:layout_height="fill_parent"
android:layout_gravity="center"
android:text="View 1"
android:textSize="30px"/>
<Button
android:id="@+id/view2"
android:src="@drawable/icon"
android:text="View 2"
android:layout_width="wrap_content"
android:layout_height="wrap_content"/>
<ImageView
android:id="@+id/view3"
android:src="@drawable/icon"
android:layout_width="fill_parent"
android:layout_height="fill_parent"
android:layout_gravity="center"/>
</ViewFlipper>
</LinearLayout>
마지막으로 actViewFlipper.java 파일에 다음과 같은 코드를 입력합니다.
01.package View.Flipper;02. 03.import android.app.Activity;04.import android.os.Bundle;05.import android.view.MotionEvent;06.import android.view.View;07.import android.view.animation.AnimationUtils;08.import android.widget.ViewFlipper;09. 10.public class actViewFlipper extends Activity {11. private ViewFlipper m_viewFlipper;12. 13. private int m_nPreTouchPosX = 0;14. 15. /** Called when the activity is first created. */16. @Override17. public void onCreate(Bundle savedInstanceState) 18. {19. super.onCreate(savedInstanceState);20. setContentView(R.layout.main);21. 22. m_viewFlipper = (ViewFlipper)findViewById(R.id.viewFlipper);23. m_viewFlipper.setOnTouchListener(MyTouchListener);24. }25. 26. private void MoveNextView()27. {28. m_viewFlipper.setInAnimation(AnimationUtils.loadAnimation(this, R.anim.appear_from_right));29. m_viewFlipper.setOutAnimation(AnimationUtils.loadAnimation(this, R.anim.disappear_to_left));30. m_viewFlipper.showNext();31. }32. 33. private void MovewPreviousView()34. {35. m_viewFlipper.setInAnimation(AnimationUtils.loadAnimation(this, R.anim.appear_from_left));36. m_viewFlipper.setOutAnimation(AnimationUtils.loadAnimation(this, R.anim.disappear_to_right));37. m_viewFlipper.showPrevious();38. }39. 40. View.OnTouchListener MyTouchListener = new View.OnTouchListener()41. {42. public boolean onTouch(View v, MotionEvent event) 43. {44. if (event.getAction() == MotionEvent.ACTION_DOWN)45. {46. m_nPreTouchPosX = (int)event.getX();47. }48. 49. if (event.getAction() == MotionEvent.ACTION_UP)50. {51. int nTouchPosX = (int)event.getX();52. 53. if (nTouchPosX < m_nPreTouchPosX)54. {55. MoveNextView();56. }57. else if (nTouchPosX > m_nPreTouchPosX)58. {59. MovewPreviousView();60. }61. 62. m_nPreTouchPosX = nTouchPosX;63. }64. 65. return true;66. }67. };68.}
전체 프로젝트 파일을 첨부합니다.
 ViewFlipperExample.zip
 ViewFlipperExample.zip
 URL을 이용해서 이미지 다운로드 하기 (멀티 쓰레드 이용)


